Guide
Professional Guide to Covering a Celebration Cake with Fondant Icing
Transitioning from a rustic sponge to a polished celebration cake requires patience and the right technique. This guide walks you through the professional UK method of prepping and covering a cake with fondant for a smooth, crack-free result that serves as the perfect canvas for decoration.
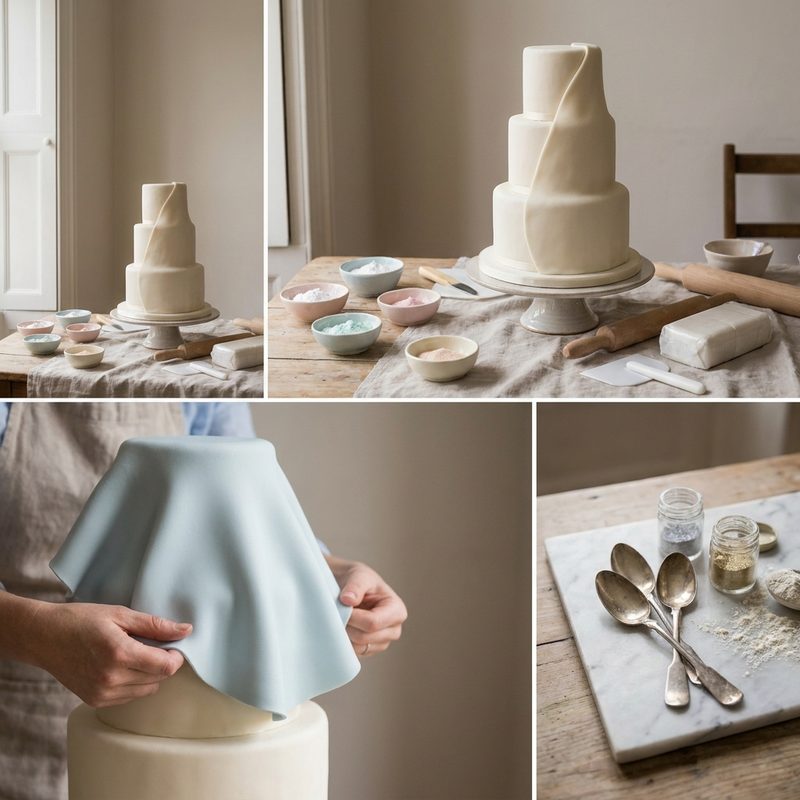
Preparing the Base
Before you even touch your fondant, your cake must be properly levelled, filled, and crumb-coated. In the UK, professional makers typically use a firm crusting buttercream or, for the sharpest results, a chocolate ganache. Ensure the cake has been chilled in the fridge for at least 30 to 60 minutes so the coating is firm to the touch. A cold, solid base is essential to prevent the cake from shifting or bulging under the weight of the icing.
Calculating and Kneading
To determine how much icing you need, add the diameter of the cake to twice the height, plus an extra 5cm for leeway. For a standard 20cm (8-inch) round cake that is 10cm tall, you will need to roll out a circle at least 45cm wide. Knead your ready-to-roll icing (fondant) on a clean, dry surface. The heat from your hands will make it pliable. Knead until it is smooth and free of any cracks or streaks.
Rolling Out the Icing
Lightly dust your work surface with sifted icing sugar or cornflour. Using a large, heavy rolling pin, roll the fondant out to a thickness of approximately 4-5mm. Regularly lift and rotate the icing by 90 degrees to ensure it is not sticking. Aim for a shape that matches your cake (circular for round cakes, square for square cakes). Avoid rolling too thin, as this will highlight imperfections in your base coat and be more prone to tearing.
Draping the Cake
Gently lift the fondant by draping it over your rolling pin or supporting it with your forearms. Position it centrally over the cake and lower it carefully. Immediately use the palms of your hands to smooth the top surface, pushing out any air from the centre towards the edges. Use your hands to gently 'cup' the top shoulder of the cake; this secures the icing and prevents the weight of the overhang from causing 'shouldering' or tearing at the top edge.
Securing the Sides and Removing Pleats
This is the most critical stage. Work from the top down. Use one hand to gently lift the skirt of the fondant outwards to remove pleats, while using the side of your other hand to press the icing against the side of the cake. This 'fanning' motion allows the fondant to stretch slightly and sit flush against the cake without folding. Once the sides are attached all the way to the base, use a plastic cake smoother in firm, circular motions to polish the surface.
Trimming and Sharpening
Use a palette knife or a sharp craft blade to trim the excess icing from the base, leaving a few millimetres to tuck neatly under the cake for a clean finish. For those coveted 'sharp edges', use two cake smoothers: hold one flat against the top of the cake and the other against the side. Move them towards each other to gently 'pinch' the icing into a crisp, 90-degree angle around the circumference.